Announcement

Collapse
No announcement yet.

Painting the 60

Collapse
X
 
  • Filter
  • Time
  • Show
Clear All
new posts

  • Painting the 60

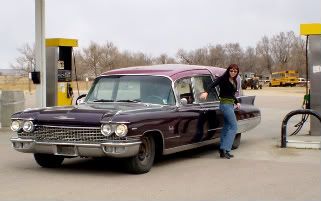
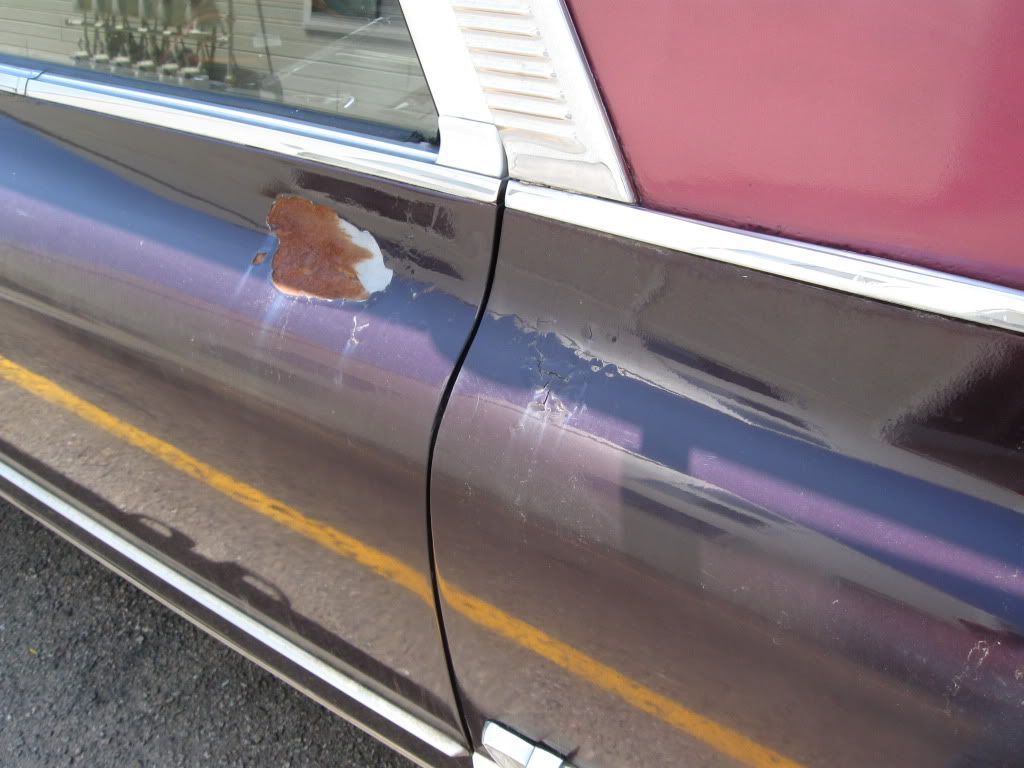
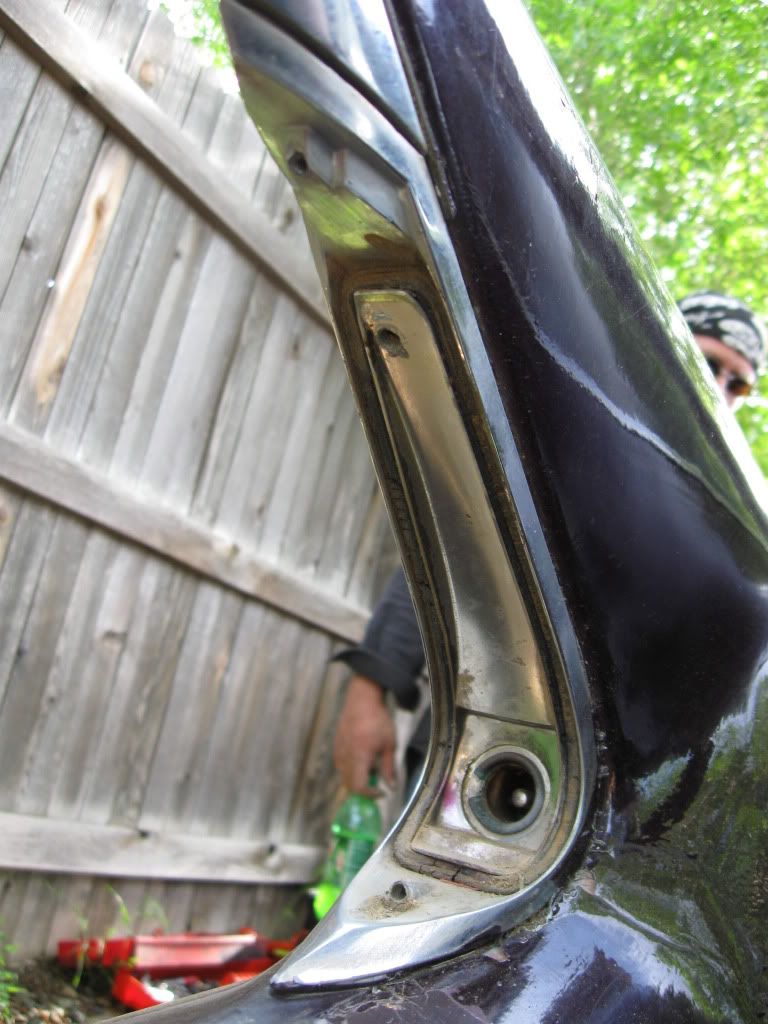
    After doing a lot of research and absolutely failing to find anyone who I would be willing to allow touching Helen, it turns out I can’t afford it anyway. After lengthy discussions with the boyfriend, we have decided to tackle the project ourselves.

    I am not terribly worried about getting a perfect result. I want a decent 20/20 finish that I’m not afraid to lean against or leave outside in the rain. Mostly I am concerned about the rust turning cancerous, so I guess the project will be more about preservation than it is about restoration or even customization. For all that Helen photographs well, she’s got some scary looking spots that make me cringe.
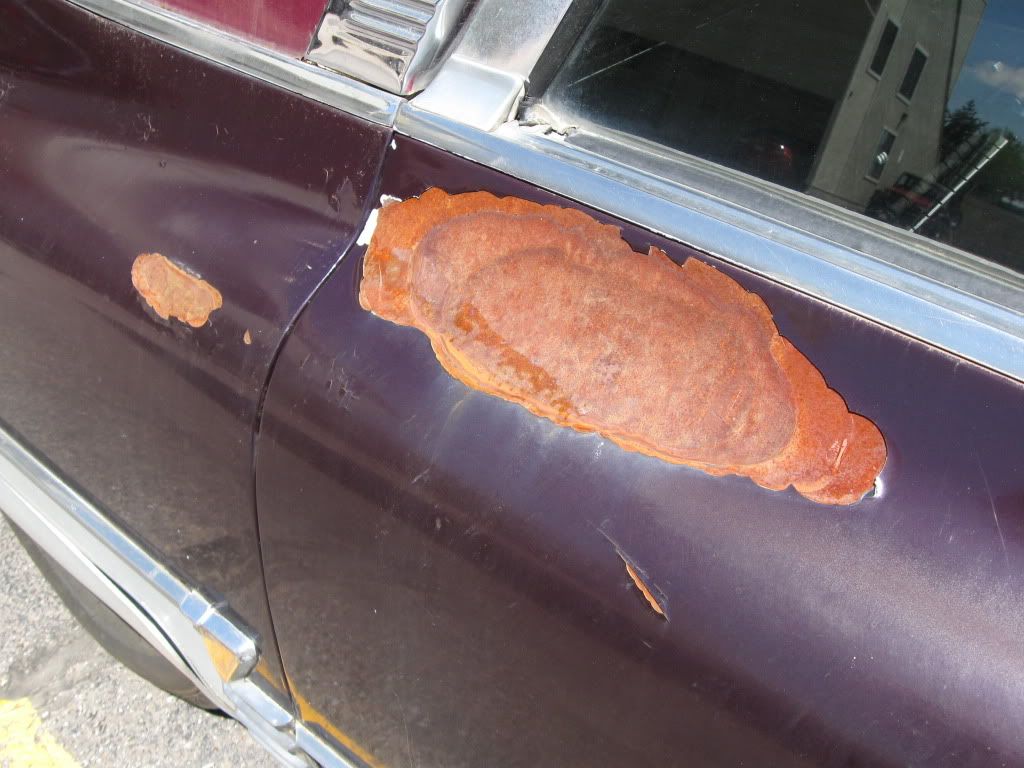
    Not to mention that her current color scheme is atrocious.


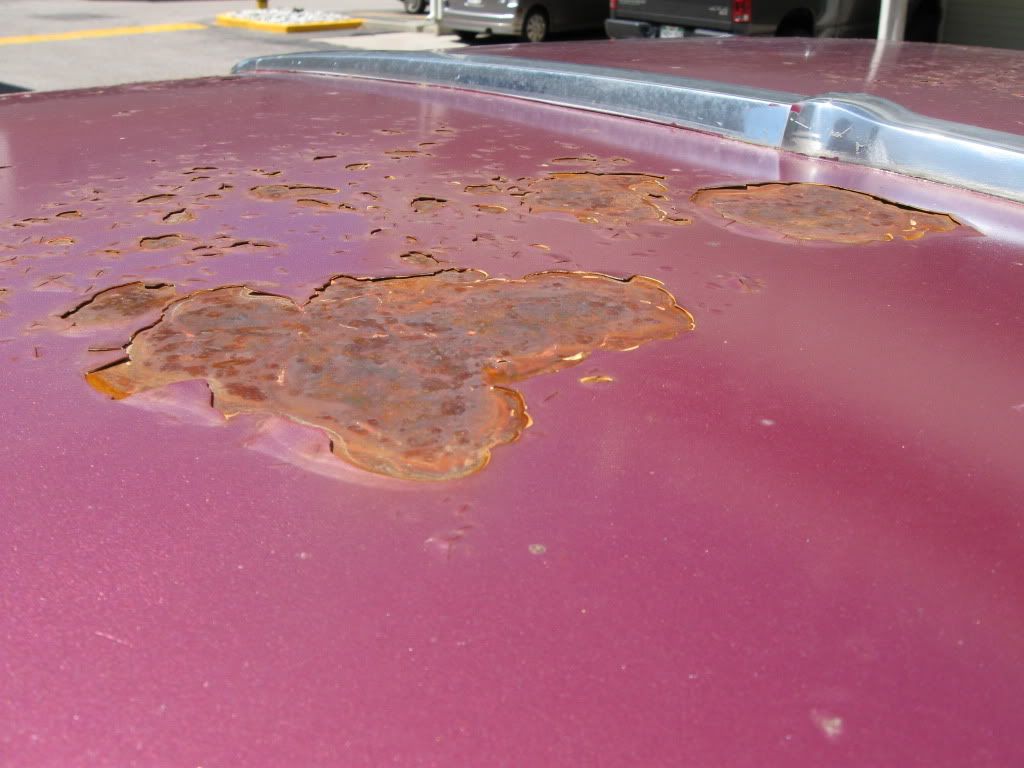
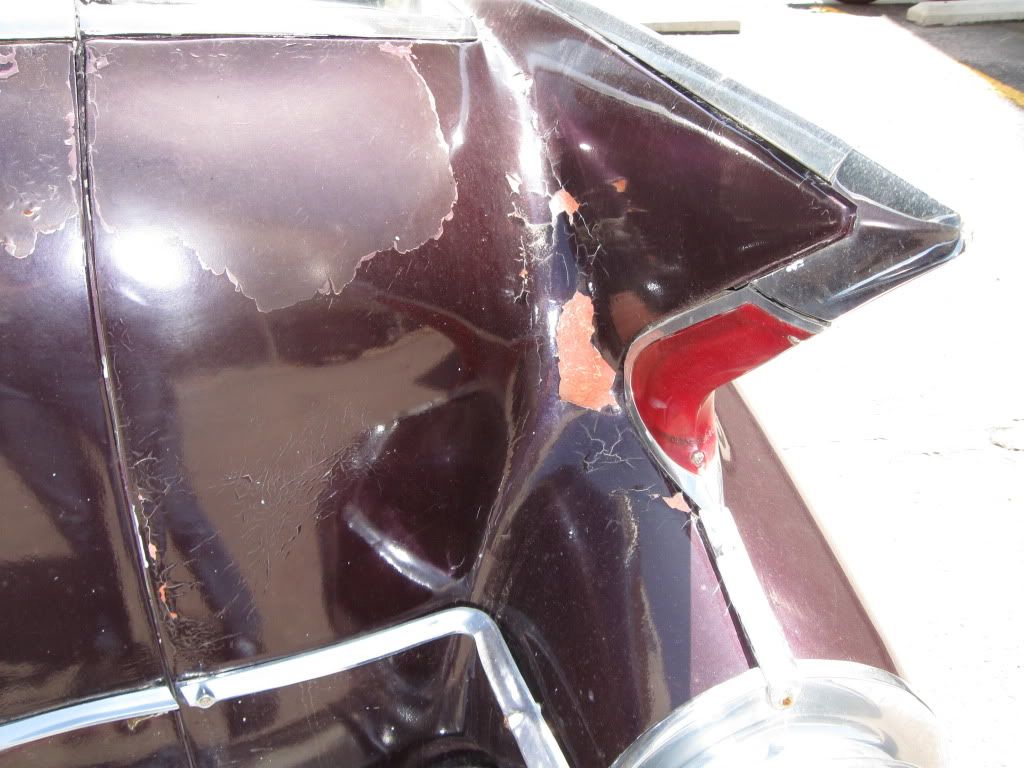
    I have zero experience with automotive paint, but I have every confidence that anything short of attacking her with house paint will be an improvement. I am also keeping an open mind for comments coming from people who have done this before, even though some of them are damned disheartening.

    Suggestions are welcome.


  • #2
    This would be my approach: Remove as much chrome as you can, and what chrome you have to sand around... do by HAND. Don't run a D.A. sander right up to the chrome, the swirl marks in the chrome will leave you crying for years. After you dig into the voids of paint with a D.A. to remove surface rust & scaling paint, skim coat those areas with putty & work it down level with a board sander, a board sander is flat & lets you level off large areas without creating the dreaded "wavy" appearance once paint is applied. Just remember the thicker you apply... the more you have to sand off. I prefer Duraglass over Bondo, but Duraglass is like sanding down STONE... it's durable as hell but needs to be applied thin. Also use coarse-grit to get areas close, then go to finer grit. Ok... once you have the coach prepped, wet sand it & wipe it down with Prep-Sol to remove oils & dirt. Prime the coach (have FUN masking that beast) & have a look-see from all angles to find high spots, low spots, & dents. Once you're satisfied with your prep & final wet sanding, paint the coach in STAGES. There's no way to maintain a wet line on a 23 foot hearse. Mask the car & paint the roof only. Next paint the front clip only, then finally the sides... 3 stages. Do light coats to avoid runs. Eastwood sells a real nice enamel CHEAP as hell compared to PPG or DuPont... it's a 1 step paint & even comes with the activator... a 3 to 1 mix if I remember right. In a clean environment you won't even need to wet sand & buff the paint, so mask off all areas not getting painted really well & even wet the floor of the area where you're painting to keep dust down. Whatever is in the air ends up IN your paint while it's drying. Sorry if this is overwhelming, but it's a big job! This is only one guy's suggestion, so use your best judgement from whatever advice you get.

    Comment


    • #3
      How soon do you want to do it? Alex and I have both done paint & body, so we might be a marginal help if/when we make it up there 2 weeks after HearseCon. Alex might even be there FOR HearseCon.

      When you get ready to strip her down, go out and buy a couple of boxes of ziploc baggies, sharpies and batteries for your camera. You cannot document well enough WHERE a clip or part goes, and HOW it went on. Try to number the baggie and part and picture in a way that putting it all back together is easy as following in numerical order backwards. Also might be a good idea to get the Superior parts book for your year, as these tend to help in figuring out how to remove some of the trim.

      Comment


      • #4
        A friend showed me, if you have screws or emblems, get some cardboard and stick it through and you can write where it came from and anything else on the cardboard. It's a lot easier to keep up with and remember where parts go back. Definitely take lots of pictures, even of little things. When you take the molding off make sure to label it all (front back and which side it goes on). Something I learned if there are holes for molding or emblems, make sure to measure before you paint or put something in the holes so paint does not cover them. When I was putting some clips in for the molding, I couldn't find the holes. I finally found them, but it was not easy. Also finding clips for the molding is not easy, make sure you save some of the original ones, there is no telling what they were actually for.
        Post an album of the progress.

        Comment


        • #5
          Honest opinion?

          For the short term, get some of that rust converter and put it on all the problem/rust areas.

          Here is an industrial one I have used.


          As far as paint, save your money and do it right the first time.
          The imperfections the car has now, add character.
          A coat of house paint will make it look like ass no matter how good of a job.

          Comment


          • #6
            It's all in the prep work. I once spent a couple of weeks sanding and primering the fender of a truck to see if I could get all of the waves out of it, and it turned out beautiful, but the rest of the truck, I just gave it a few coats of sandable primer with 180 and a DA sander and finished it with 400 and an acrylic lacquer topcoat (this was 20 years ago).

            My recommendation, for a classic like this, is to use a rust treatment to keep it from spreading, and save up for a professional job. You want to learn paint and body work on an old beater. I would be worried about making a hole in it, trying to get rid of some of that rust. From what I can tell from the pictures, I wouldn't take a chance on sandblasting it, or even powder blasting.

            My coach already has a rust hole, and I'm not looking forward to patching the metal, because I've never done it. I may have the professional who repairs our big rig do that part of it, and the rest will take a few years, after I finish the interior. Some people would Bondo it, take it to Earl Scheib, and sell it, which is why I stay away from cars with new paint jobs, unless someone vouches for the seller. In a way, you're better off, because at least you know what you have.

            House paint will indeed look like ass, and rattle cans are not appropriate. Even though they can be used for small areas, they're expensive because they don't go very far, and your fingers will be throbbing before you have a good start.

            Hope this helps, and sorry about rattling on, as well as that bad pun.

            -denise

            Comment


            • #7
              Thank you for the responses. There is some good information here that may come in handy. I am hoping to start with the prep work within the week, as now is when I have the time. I have almost three solid weeks to work on the car. Zack has generously offered space and experience in exchange for the use of Helen in a couple of photo shoots, which he knows I would have done anyway.


              If I had the possibility of an increased income within the next few months, I would wait, but right now, all of the rust on Helen is surface. As bad as it looks, all of the metal exposed by the cracking and peeling paint is smooth and solid. The paint itself was put on really thick all over the car, and there’s not anywhere on her where it hasn’t started to pop.

              Comment


              • #8
                This thread by 59megawagon should be of some use for 'ya:


                Make sure you check all the attachments.

                Has Helen spoken about her new pajamas yet?

                Comment


                • #9
                  Originally posted by Atti View Post
                  Has Helen spoken about her new pajamas yet?
                  I've been drooling over this one http://www.paintwithpearl.com/candy/...wp405bpics.htm

                  Just realised the other day that it matches the color of her dash pad. I'll be content with anything that saves her from further damage and no longer resembles Hell's Easter Egg.

                  Comment


                  • #10
                    I really like the color scheme that is on there.

                    I've never been able to do a professional-looking job with anything but solid colors. It's tough. Anything that sparkles always comes out streaked. Maybe I put it on too thick...I thought I might try a few thin coats next time I do it, or a wider fan, unless someone has some advice.

                    -denise

                    Comment


                    • #11
                      Nate is awesome. Today while we were out, he took me on a couple of parking lot tours, explaining the differences in the paint on various cars. He then took me to the shop to take a more educated look at the paint he has done on his latest motorcycle project. The last thing he did was hand me every tool he had available for stripping paint and set me up with the tank off of my Virago, and let me go at it to see what I preferred for the job. I ultimately chose a small angle grinder with a plastic-feeling stripping wheel. It takes the paint of quickly, but gently enough that I could see the layers coming off before it got to shiny bare metal. I also liked how it showed me high and low spots, and maneuvered easily around the curves. I was impressed. Tomorrow we start on the real thing.

                      Comment


                      • #12
                        Any man who will let you touch his tool, er, um, tools, is awesome. I lock my box when I see my daughter's boyfriend coming.

                        That didn't come out right, did it?

                        -denise

                        Comment


                        • #13
                          One day down... Many more to go.

                          We are almost done getting the trim off, and it's apparent that it was just masked over for the purple/pink job. We are having some trouble due to screws being both difficult to reach and rusted in place.

                          Spreaking of rust, I have yet to uncover anything terrible. Most of the bad spots are where you'd expect them, and not even close to as far gone as I figured they might be. The underside of the chrome below the doors was packed with dirt, and even that didn't cause rot.

                          One particularly tricky spot is the crome around the tail lights in the fins. Any suggestions for getting that off? I'm afraid to apply too much pressure.

                          Comment


                          • #14
                            I'm on my way to begin day three of Helen's makeover. We still have a few bits of chrome that we're fighting with, but we'll actually get some paint stripped today.

                            Store your photos and videos online with secure storage from Photobucket. Available on iOS, Android and desktop. Securely backup your memories and sign up today!

                            Comment


                            • #15
                              Lovin' Helen's well deserved makeover updates Traveler. One question though: Why didn't you wait until after HearseCon?

                              Comment

                              Working...
                              X