 Tweet
Tweet
How much paint did it take to do 2 coats of color on your coach? I am getting ready to do mine in single-stage black, and I am hoping 2 gallons will be enough... I am not painting the roof though...
-
-
we did the 68 single stage less the roof 1 1/2 gal

that was just a fast cover up job
we thinking of going base clear this next time i think that will be a richer color -
Most single stage paints mix 1 to 1 + hardener, so 2 gallons makes just over 4 gallons sprayable and should be plenty.
Like northgahearse said, you will probably only really use about 1 1/2 gallons, (3 spayable), so you will still have some for touch ups later. Only mix up what you need as you go though, because after you mix in the hardener, it cannot be saved for touch ups later. Also when you get about half way through the first gallon, mix in half of the second gallon to keep your color more consistant. It really sucks when you go to spray the first cost of the second gallon and it doesn't match exactly to the first, lol.
Mines is base clear, and we used 1 gallon of base (2 gallons sprayable) and 1 1/2 gallons of clear, (2 gallons sprayable)
Remember if you're going to cut and buff it after, make sure you put plenty on, so you can cut some off without sanding through. (that can ruin your whole day, lol)
Comment
-
Originally posted by
Mines is base clear, and we used 1 gallon of base (2 gallons sprayable) and 1 1/2 gallons of clear, (2 gallons sprayable)
Remember if you're going to cut and buff it after, make sure you put plenty on, so you can cut some off without sanding through. (that can ruin your whole day, lol)
[IMG
yeah i'm going base clear that is one badass looking ride
how many coats of base did you go with?Comment
-
Thanks.
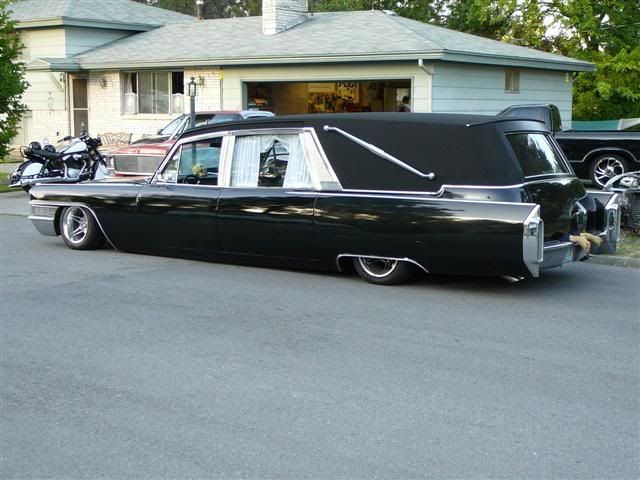
If I remember correctly 4 base and 4 clear. It's been a while, that paint job as you see it in that pic is actually over 13 years old.
There is actually some adavntages to doing single stage over base/clear. With single stage you get a harder finish and a deeper color if done right, and since the color goes all the way through, you don't get all those light white scratches that you get when you rub up against a cleared paint job. The biggest advantages to base/clear, is it's softer and easier to work with and repair, also it cuts and buffs much easier.
Remember, 99% of a quality paint job is in the prep. If you have a great surface to paint on, you can totally mess up the paint it self, then cut and buff the crap out of it and still get a stellar paint job, lol. (I've seen it). The biggest thing is to get enough material on there so you have room to cut some off. If your surface is crap, no matter how good of paint, or gun, or person you have painting it is, it will still look bad.Comment
-
Originally posted by Creepy Cruiser View Post
ok i am going to ask a dumass question(s)...but..do you drive it that low?
i mean that is one loooow dude...and looks great...or is pneumatics in place...also...you made the door handles disappear...how????
ok...one more comment...i want to chop the ass end roof 4 -6 inches and keep the front intact any advice on how to angle that chop to remulate a dodge magnum flow on my 83...
PLAN....I want to lower it like yours and dissappear the protruding hardware like -doorhandles-bogus mirrors- and chop the ass end 6''...and skirts...does 83 have them available...or is is gonna be a custom job?
if you can vision that...its what i am planning to do...but as a newb with so many wants-wants-wants- ...i am just looking here for all input ....as you guys are the core of what i have been looking for for over year ....Comment
-
Ok, lol.
Actually yes, I do sometimes drive it that low. The body is actually sitting on the ground in that pic, and I quite often drop it flat on the ground and drag the crap out of the body and frame in order to throw huge amounts of sparks out the back.
Yep, is has all hand built custom air bag suspension under it, so when I don't want to drag it, I can lift it up to a reasonable ride height and cruse around town without getting arrested.
Yes, I shaved off all kinds of stuff like: (the handles, key locks, antenna, rear drip rail, body moldings, mirrors, etc...). The doors are remote control now, using actuators to pop them open.
As for chopping the roof on yours, that is a huge huge amount of work, and you really need to know what you're doing to pull one off correctly. If you're not a huge fabricator, I'd seek some pro help on that if I were you. I've done them before and they are quite the project.Comment
-
[/QUOTE]
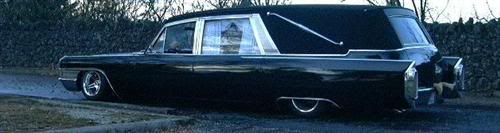
ONCE AGAIN, I AM BLOWN AWAY AT HOW CLEAN THAT 65 IS FOR A CUSTOM JOB!
you need an album on here with more picsComment
-
A) need more pics of that bike in the background
B) need a SHITLOAD more pics of your car. That thing is one of the sexiest coaches I've seen in a long time. Need more fap-fap material.Comment
-
LOL, Thanks guys.
I'll see what I can find for more pics. Remember, I built this car before there was much in the way of digital anything, lol. I have to find old pics and scan them in to post them, that's why the quality is so bad on some. I'll start an album soon though.
That bike is a buddy of mines, I'll see if I can get some pics from him on it.Comment
-
Just park it in a parking lot and take 2 dozen pics of it while walking a huge circle around it. Thing is dope!Comment
-
paint
you should have plenty even if you put extra on for wet sanding and buffing. You should have enough to also paint the door jambs too. Lets see some pics when its done.Comment
-
Appreciate the information guys!
I worked for 18 months doing pre-paint and post-paint for a small body shop chain here in Dallas, but never got near the paint guns. I have prepped more doorjambs and hinges than I care to remember and pissed off more than my share of body guys by finding flaws in thier work. The real kicker is when I piss off the customer because the smooth finish on the new paintwork doesn't match the orange-peeled factory paint...
I want to go single-stage because it is still a driven vehicle, and blemishes are easier to fix. No blending required. But the initial cut and buff WILL be a bitch...Comment
-
Yep, single stage gets friggin hard quick, lol.Comment
-
OK, I have to ask a stupid question, and admit that I'm getting old.
What kind of paint is being used these days? The last time I painted a car was 25 years ago (yes, really), and we were using acrylic enamel and acrylic lacquer back then. Imron (I think that's what epoxy paint was called, before the word sounded like something naughty), was just coming into style, and we spent a lot of time sitting outside of a hangar smoking dope because we had to evacuate while an aircraft was being painted.
My coach was probably painted with acrylic enamel, or whatever Earl Scheib was using, the last time, and if and when I finish the body work, I would like to be able to speak intelligently with the color shop when I buy the paint. Can anyone help with the technical nomenclature?
ThankieComment


Comment